
The Ultimate DIY Car Cleaning Guide: From Grime to Gleam
Section 1: Gathering Your Arsenal – The Essential Cleaning Supplies
Achieving a showroom shine at home hinges on having the right tools and products. Skimping here will only result in a less-than-stellar finish and potentially damage your car’s delicate surfaces. This section details the must-have items for a comprehensive DIY car cleaning session.
-
Microfiber Wash Mitts: These are vastly superior to sponges, which can trap dirt and scratch the paint. Invest in at least two: one for the upper body and one for the lower, dirtier sections. Opt for thick, plush mitts with long fibers to lift dirt effectively. Regularly wash your mitts after each use to prevent buildup.
-
Two Buckets (Wash & Rinse): The two-bucket method is crucial for preventing swirl marks. One bucket is filled with soapy water (see car wash soap below), and the other with clean water. After washing a section of the car, rinse the mitt in the clean water bucket before re-dipping it into the soapy water. This prevents transferring dirt back onto the car. Grit guards, placed at the bottom of each bucket, further isolate dirt that falls off the mitt.
-
Car Wash Soap (pH Neutral): Avoid using household detergents like dish soap. These are too harsh and strip away waxes and sealants, leading to faded paint. Choose a pH-neutral car wash soap specifically designed for automotive finishes. Look for soaps that create a rich, lubricating foam. Meguiar’s Gold Class and Chemical Guys Mr. Pink are popular choices.
-
Wheel Cleaner: Wheels are notorious for accumulating brake dust, road grime, and tar. A dedicated wheel cleaner is essential. Opt for a pH-balanced wheel cleaner that is safe for all wheel types (alloy, chrome, painted). Test on an inconspicuous area first to ensure compatibility. Iron removers can further break down embedded brake dust for a deeper clean.
-
Tire Cleaner & Dressing: A clean and dressed tire enhances the overall appearance. A tire cleaner removes dirt and grime, while a tire dressing adds a rich, black shine. Choose a dressing based on your desired finish: matte, satin, or gloss. Apply the dressing sparingly to avoid sling onto the paint.
-
Glass Cleaner: Streaky windows are a common frustration. Use a dedicated automotive glass cleaner, as household cleaners often contain ammonia that can damage tinted windows. Spray the cleaner onto a microfiber cloth, rather than directly onto the glass, to prevent overspray.
-
Interior Cleaner: A multi-purpose interior cleaner is suitable for cleaning dashboards, door panels, and consoles. Avoid cleaners that leave a greasy residue. For leather surfaces, use a dedicated leather cleaner and conditioner.
-
Vacuum Cleaner: A powerful vacuum cleaner is essential for removing dirt, crumbs, and debris from the carpets and upholstery. A shop vac with various attachments is ideal.
-
Microfiber Towels (Drying & Polishing): Invest in high-quality microfiber towels for drying and polishing. Waffle weave towels are excellent for drying, as they absorb a large amount of water. For polishing, use plush, lint-free microfiber towels. Keep separate towels for interior and exterior use.
-
Detailing Brushes: These are small brushes used to clean hard-to-reach areas, such as air vents, crevices, and emblems. A variety of sizes and shapes are useful.
-
Clay Bar & Lubricant: A clay bar removes embedded contaminants from the paint surface, such as tree sap, industrial fallout, and overspray. Use a clay bar lubricant to prevent scratching the paint.
-
Wax or Sealant: Wax or sealant protects the paint from the elements and enhances its shine. Wax provides a warm, rich glow, while sealant offers longer-lasting protection.
Section 2: The Exterior Wash – A Step-by-Step Guide to Sparkle
This section outlines the process of washing your car’s exterior, ensuring a thorough clean without causing damage.
-
Pre-Rinse: Begin by rinsing the entire car with water to remove loose dirt and debris. This helps prevent scratching during the washing process. Use a strong stream of water, focusing on areas that tend to accumulate dirt, such as the wheel wells and lower body panels.
-
Wheel Cleaning: Apply wheel cleaner to the wheels, following the manufacturer’s instructions. Use a wheel brush to agitate the cleaner and loosen dirt and brake dust. Rinse thoroughly with water.
-
Foam Cannon (Optional): A foam cannon attached to a pressure washer creates a thick layer of foam that clings to the car’s surface, lifting dirt and grime. This is an effective way to pre-wash the car.
-
Two-Bucket Wash: Dip the wash mitt into the soapy water bucket and wash the car in sections, starting from the top and working your way down. Use gentle, overlapping strokes. Rinse the mitt in the clean water bucket after each section.
-
Rinse Thoroughly: Rinse the entire car with water to remove all traces of soap.
-
Drying: Use a clean, dry microfiber towel to dry the car. Start from the top and work your way down. Avoid rubbing the towel against the paint; instead, blot or pat dry.
-
Clay Bar Treatment (Periodic): After washing and drying, use a clay bar to remove embedded contaminants. Knead the clay bar into a flat, pliable shape and spray the clay bar lubricant onto a small section of the car. Gently glide the clay bar over the surface in overlapping strokes. Wipe away any residue with a clean microfiber towel.
-
Waxing or Sealing: Apply wax or sealant according to the manufacturer’s instructions. Use a clean applicator pad to apply a thin, even layer of wax or sealant to the paint. Allow the wax or sealant to dry according to the manufacturer’s instructions. Buff off the excess wax or sealant with a clean microfiber towel.
Section 3: Interior Detailing – Bringing the Inside Back to Life
The interior of your car deserves just as much attention as the exterior. This section guides you through cleaning and detailing the interior surfaces.
-
Vacuuming: Vacuum the entire interior, including the carpets, seats, and floor mats. Use the crevice tool to reach tight spaces.
-
Surface Cleaning: Spray interior cleaner onto a microfiber cloth and wipe down all surfaces, including the dashboard, door panels, and console. Use a detailing brush to clean air vents and other hard-to-reach areas.
-
Glass Cleaning: Spray glass cleaner onto a microfiber cloth and clean all windows and mirrors. Wipe dry with a clean, dry microfiber towel.
-
Leather Care (If Applicable): Apply leather cleaner and conditioner to leather seats and other leather surfaces. Follow the manufacturer’s instructions.
-
Floor Mat Cleaning: Remove floor mats and shake them to remove loose dirt. Vacuum both sides of the mats. For heavily soiled mats, scrub them with a brush and soapy water. Rinse thoroughly and allow them to dry completely before replacing them in the car.
-
Odor Removal: If your car has an unpleasant odor, use an odor eliminator spray or a car air freshener.
Section 4: Beyond the Basics – Advanced Detailing Techniques
For those seeking an even higher level of shine, this section explores advanced detailing techniques.
-
Paint Correction: Paint correction involves using polishing compounds and a machine polisher to remove scratches, swirl marks, and other paint defects. This is a more advanced technique that requires skill and experience.
-
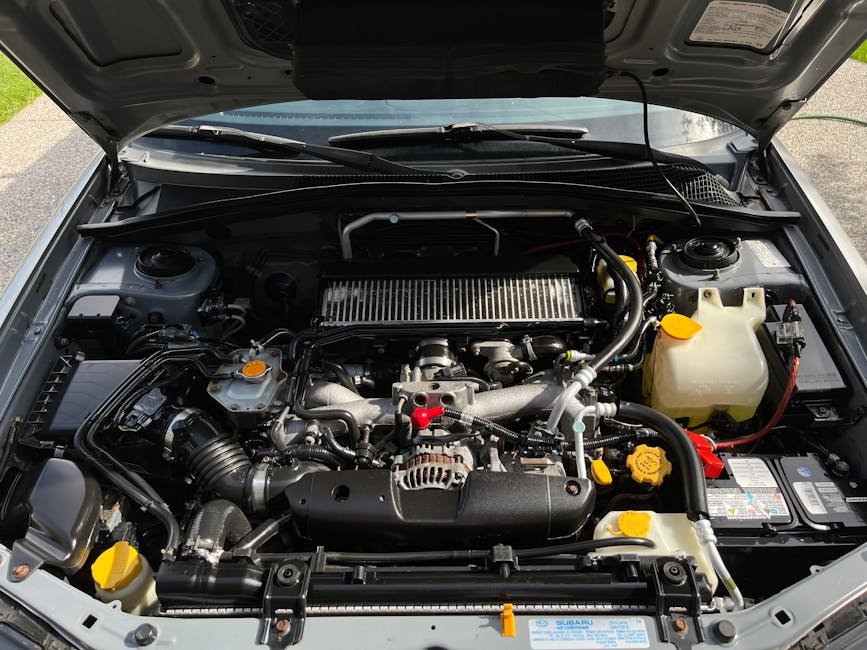
Engine Bay Cleaning: A clean engine bay enhances the overall appearance of the car. Use an engine degreaser and a brush to clean the engine bay. Rinse thoroughly with water, being careful not to get water into sensitive electrical components.
-
Headlight Restoration: Cloudy or yellowed headlights can significantly reduce visibility. Use a headlight restoration kit to restore the clarity of your headlights.
-
Trim Restoration: Faded or discolored trim can detract from the appearance of the car. Use a trim restorer to restore the trim to its original color and shine.
-
Fabric Protection: Apply a fabric protector to the seats and carpets to protect them from stains and spills.
This comprehensive guide provides a roadmap to achieving a showroom shine at home. By following these steps and using the right products, you can keep your car looking its best for years to come.



Leave a Reply