

Car Air Filter Replacement: A Simple Guide
Understanding the Vital Role of Your Car’s Air Filter
The car air filter, often overlooked, plays a critical role in the health and performance of your vehicle. It’s the unsung hero responsible for cleaning the air entering your engine, safeguarding it from harmful contaminants. Think of it as your engine’s respiratory system, filtering out dust, pollen, dirt, debris, and even insects before they can wreak havoc. Without a properly functioning air filter, your engine is vulnerable to accelerated wear and tear, reduced fuel efficiency, and diminished performance. The air filter prevents abrasive particles from damaging sensitive engine components like the pistons, cylinder walls, and valves. This protection is paramount in extending the lifespan of your engine and maintaining its optimal operating condition. Furthermore, a clean air filter ensures that the air-fuel mixture is accurate, leading to more efficient combustion and better gas mileage. A clogged air filter restricts airflow, forcing the engine to work harder and consume more fuel to compensate. This can lead to noticeable drops in fuel economy and increased emissions.
Recognizing the Signs of a Dirty Air Filter
Knowing when to replace your air filter is crucial. While manufacturer recommendations provide a general guideline (typically every 12,000 to 15,000 miles or annually), several telltale signs indicate that a replacement is needed sooner.
- Reduced Fuel Economy: A noticeable drop in miles per gallon (MPG) is often the first indicator. The engine has to work harder to draw in air, leading to increased fuel consumption.
- Sluggish Acceleration: A clogged air filter restricts airflow, making it harder for the engine to breathe and respond quickly to acceleration.
- Misfiring Engine: Insufficient airflow can disrupt the air-fuel mixture, causing the engine to misfire. This may manifest as rough idling or stalling.
- Black Smoke from the Exhaust: A rich air-fuel mixture (too much fuel, not enough air) caused by a restricted air filter can result in black smoke emanating from the exhaust pipe.
- Check Engine Light: In some cases, a severely clogged air filter can trigger the “Check Engine” light on your dashboard.
- Visually Dirty Filter: The most obvious sign is a visually dirty air filter. Remove the filter and inspect it. If it’s covered in dirt, debris, or looks excessively dark, it’s time for a replacement. Compare the old filter to a new one for a clear visual difference.
- Whistling Noise: A whistling sound coming from the engine compartment can sometimes indicate a restricted airflow due to a clogged air filter.
Gathering Your Tools and Supplies
Replacing your car air filter is a straightforward process that requires minimal tools and supplies. Before you begin, ensure you have the following:
- New Air Filter: Purchase the correct air filter for your vehicle’s make, model, and year. Consult your owner’s manual or a parts store to identify the appropriate filter. Using the wrong filter can compromise engine performance and protection.
- Screwdriver: You’ll likely need a screwdriver (usually a Phillips head or flathead) to open the air filter housing.
- Wrench or Socket Set (Potentially): Some air filter housings may require a wrench or socket set to remove bolts or clamps.
- Gloves: Wearing gloves will protect your hands from dirt and grime.
- Shop Towels: Keep shop towels handy for cleaning up any dirt or debris.
- Vacuum Cleaner (Optional): A vacuum cleaner can be useful for cleaning out the air filter housing before installing the new filter.
Step-by-Step Guide to Replacing Your Car Air Filter
-
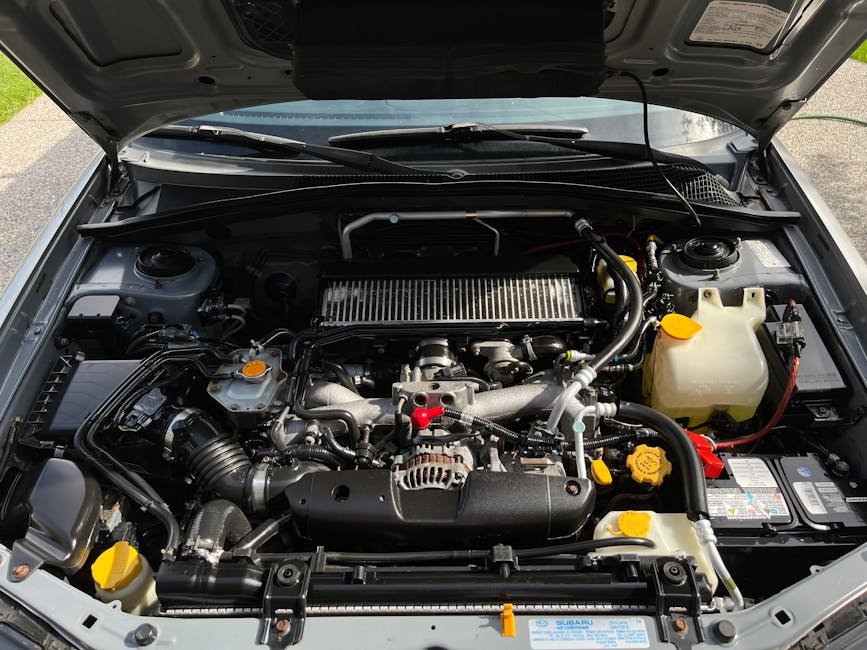
Locate the Air Filter Housing: Consult your owner’s manual to find the location of the air filter housing. It’s typically a black plastic box located under the hood, often near the engine. Common locations include on top of the engine, to the side of the engine, or near the front of the engine compartment.
-
Open the Air Filter Housing: Use the appropriate screwdriver, wrench, or socket to loosen and remove the fasteners securing the air filter housing. These fasteners may be screws, clips, clamps, or bolts. Carefully detach any hoses or sensors connected to the housing. Some housings simply snap open. Take note of how the housing is assembled to ensure you can reassemble it correctly.
-
Remove the Old Air Filter: Once the housing is open, carefully remove the old air filter. Note its orientation – how it was positioned inside the housing. This will help you install the new filter correctly.
-
Clean the Air Filter Housing (Optional but Recommended): Before installing the new filter, take this opportunity to clean the inside of the air filter housing. Use a vacuum cleaner or shop towels to remove any dirt, debris, or leaves that may have accumulated.
-
Install the New Air Filter: Place the new air filter into the housing, ensuring it’s oriented correctly (matching the position of the old filter). The filter should fit snugly into the housing.
-
Reassemble the Air Filter Housing: Carefully reassemble the air filter housing, securing all screws, clips, clamps, or bolts. Reattach any hoses or sensors that were disconnected. Ensure the housing is properly sealed to prevent unfiltered air from entering the engine.
-
Double-Check Your Work: Before closing the hood, double-check that all fasteners are tightened, hoses are connected, and the air filter housing is securely closed.
-
Dispose of the Old Air Filter Properly: Dispose of the old air filter responsibly. Many auto parts stores offer recycling programs for used filters.
Choosing the Right Air Filter: Paper vs. Performance Filters
When selecting a new air filter, you’ll typically encounter two main types: paper filters and performance (or reusable) filters.
- Paper Filters: These are the most common and affordable type. They are typically made of pleated paper and offer good filtration. They are disposable and should be replaced at regular intervals. Paper filters are generally sufficient for everyday driving conditions.
- Performance (Reusable) Filters: These filters are typically made of oiled cotton gauze or synthetic materials. They offer slightly better airflow and can be cleaned and reused, making them a more sustainable option. However, they are more expensive than paper filters and require regular cleaning and oiling. Performance filters may offer a slight performance boost, but the difference is often negligible in most everyday driving situations. Over-oiling a performance filter can damage the mass airflow sensor.
Troubleshooting Common Issues
- Difficulty Removing Fasteners: If you’re having trouble removing screws or bolts, try using penetrating oil to loosen them. Be patient and avoid stripping the threads.
- Incorrect Filter Fit: If the new filter doesn’t fit properly, double-check that you have the correct part number for your vehicle.
- Damaged Air Filter Housing: If the air filter housing is damaged, it may need to be replaced. A damaged housing can allow unfiltered air to enter the engine.
- Check Engine Light Remains On: If the “Check Engine” light remains on after replacing the air filter, there may be another underlying issue. Consult a qualified mechanic for diagnosis and repair.
Maintenance Tips for Air Filters
- Regular Inspections: Visually inspect your air filter every time you change your oil. This will help you identify when it needs to be replaced.
- Avoid Driving in Dusty Conditions: If you frequently drive in dusty or off-road conditions, you may need to replace your air filter more often.
- Consider a Pre-Filter: For vehicles that regularly operate in dusty environments, consider installing a pre-filter. A pre-filter is a screen or mesh that sits in front of the main air filter, capturing larger particles and extending the lifespan of the main filter.
Replacing your car air filter is a simple and cost-effective way to maintain your vehicle’s performance, fuel efficiency, and engine health. By following these steps, you can easily perform this maintenance task yourself and save money on professional service.






Leave a Reply